Showing posts with label sculpting. Show all posts

Sunday, November 03, 2013

Victorian Art Doll Witch

This Year's Witch

Every year I create another art doll witch to add to my growing collection. Here is this year's version - she's a little Victorian-style, not a traditional witch.
 
Nina Owens Victorian-style Art Doll Witch


Close up - Victorian Art Doll Witch by Nina Owens
 I'm still exploring dolls using birdcages. This is an antique cage a friend gave me. True to Victorian-nature, her cage is filled with bottles of potions and elixirs. I played around with pan pastels for coloring her face. It was a new medium for me and I really enjoyed using it for her face.

Sunday, October 06, 2013

Halloween Décor


The materials
Adding glass beads for eyes
and forming nose
 I spotted these cool foam skulls in Michaels from their Celebrate It! Halloween collection. I thought they would be the perfect base for sculpting - after all they are already the proper foundation for a head.
Starting sculpting by adding
clay around form
Finished with sculpting


Sealed with gesso, then antiqued
with wash of brown acrylic paint


Glass jar that I've had for years
from Michaels. I used a rust
patina on it to age. Added dried
lichen moss.
 
 
                  2-step crackle medium added &
                    antiqued with black. Eyes painted.
                         Glaze added to lips and eyes
 
    
Finished Head-in-Jar


Sunday, November 04, 2012

Treasures of the Gypsy Challenge


Birdcage repainted
 & highlighted
This year the Treasures of the Gypsy Challenge was "Charmed and Mystical Gypsy". The dolls are displayed and judged at the Houston International Quilt Show. The gypsy doll I created for the challenge was actually the first birdcage doll I made, however I couldn't show her until the judging was over. Unfortunately I couldn't attend the show this year, but I'm honored to say my doll was awarded Judge's Choice. I've detailed some of the progress in creating this doll. The head was actually the head I sculpted in Diane Keeler's workshop. She had just been one of the many "heads on sticks" in my studio until I decided to use her for this doll. I didn't have much time to create the doll as I didn't sign up for the challenge until the end of July and they had to be mailed to Houston in September. I removed all of the previous face and eye painting and repainted the face to more represent a gypsy. (She was previously blue-eyed). I had the birdcage on hand, I'd found it at Michaels in the garden decor aisle. The charms are from Michaels as well, most of them from Susan Lenart Kazmir's Industrial Chic line.


Attached to cage
Starting to clothe


Adding puff netting sleeves
Using ribbon for corset
Eyelets & mini brads for vest & shirt
With trims added front

Back view with trims

She has hair!

Crinkled hair


Close up of cage with charms inside

Finished doll prior to shipping

Close up finished Gypsy

Charmed & Mystical Gypsy on Display at Houston Quilt Show prior to judging

 
Here is the information for next year's challenge:

The 2013 Treasures of Gypsy Challenge: The Masquerade Ball

Announcing the Treasures of the Gypsy Challenge 2013: Magical Mystical Gypsy. If you would like to participate, send $25.00 US to Treasures of the Gypsy, P.O. Box 748, Mountainair, NM 87036.


Sunday, November 13, 2011

In The Studio


What a mess - works in progress
Heads on sticks - some are now witches


I've got a really great studio space. It was supposed to be the formal dining room, but we aren't formal dining room type people. I love that it has a big window the looks out onto my front yard and up the road. Lots of the pieces of storage in my studio are recycled and they work great for their new purpose. I also usually have lots of "heads on sticks", heads that I've sculpted waiting on bodies and to be incorported into the latest art doll. I like sculpting the heads best, so there are usually several pots filled with them. The first part of next year I plan on taking out the carpet in the room and covering the floor of my studio by decoupaging book pages on to it. While I have all the furniture out, I'll probably paint the walls. I'm thinking about corking one so it will be a permanent bulletin board and I think I'll cover one section with chicken wire so I'll have a place to hang things without sticking pins or nails into the wall.

Display of finished dolls
More heads on sticks
Supply storage
Wall unit from surplus - bead storage
More Dolls


I've created several dolls this year. I had the opportunity to test a new clay prior to its arrival in the store. It is Art Minds Clay Mache, Michaels private label brand of air dry clay. I LOVE it. It sculpts like a dream, is easy to smooth and blend into itself and sands beautifully. I like it so much, I've done more air dry clay dolls recently than polymer clay ones. The good news is that it is now available in the Michaels store. Here is one of the first sample dolls I made with it. She is entirely sculpted from the air dry clay, head, arms, hands, legs, feet and body. She's dressed with stuff from the floral department and her hair is faux fur.
Close up


Aren't those glittered tennis shoes the coolest?


This summer I also took an online workshop with Christy Meyers of CC Whimsies. We created a pumpkin fairy doll. The workshop was a doll to hang on the wall, but I'd found these really cool glittered tennis shoes at Treasures of The Gypsy at the ADAA doll conference in Austin and wanted to use those, so my pumpkin fairy stands. This was a great workshop as it was all done with videos and Christy even generously provided us with a pdf file as well.
I sculpted a couple of extra heads during the workshop. One I turned into a steampunk box doll and the other one is still waiting on my to create the rest of it.

This doll is also from the clay mache clay and uses a paper mache mannekin form for her body. She's a mixed media doll inspired by the Santos dolls.
I played around with some polymer clay dolls this year, too. One has a box body and the other has a candlestick for the body. I taught the box one as my break-out session on the Michaels Crafting Cruise in October.

Sunday, August 15, 2010

While I was on a roll with the conference theme, I created what I call the Moon Riders, acrobats on a cresent moon. The burgandy one was a custom order for a lady at work.
With faces painted
Sculpted with air-dry clay
I created a 2nd centerpiece doll to donate. This doll had an unusual beginning. A couple of years ago my secret Santa at work gave me two big, red, plastic ornaments (I don't decorate anymore for Christmas & red is definately not one of my favorite colors). I always felt I could do something with them. At one time I thought I would do a puppet head with a hat - due to the shape of them.
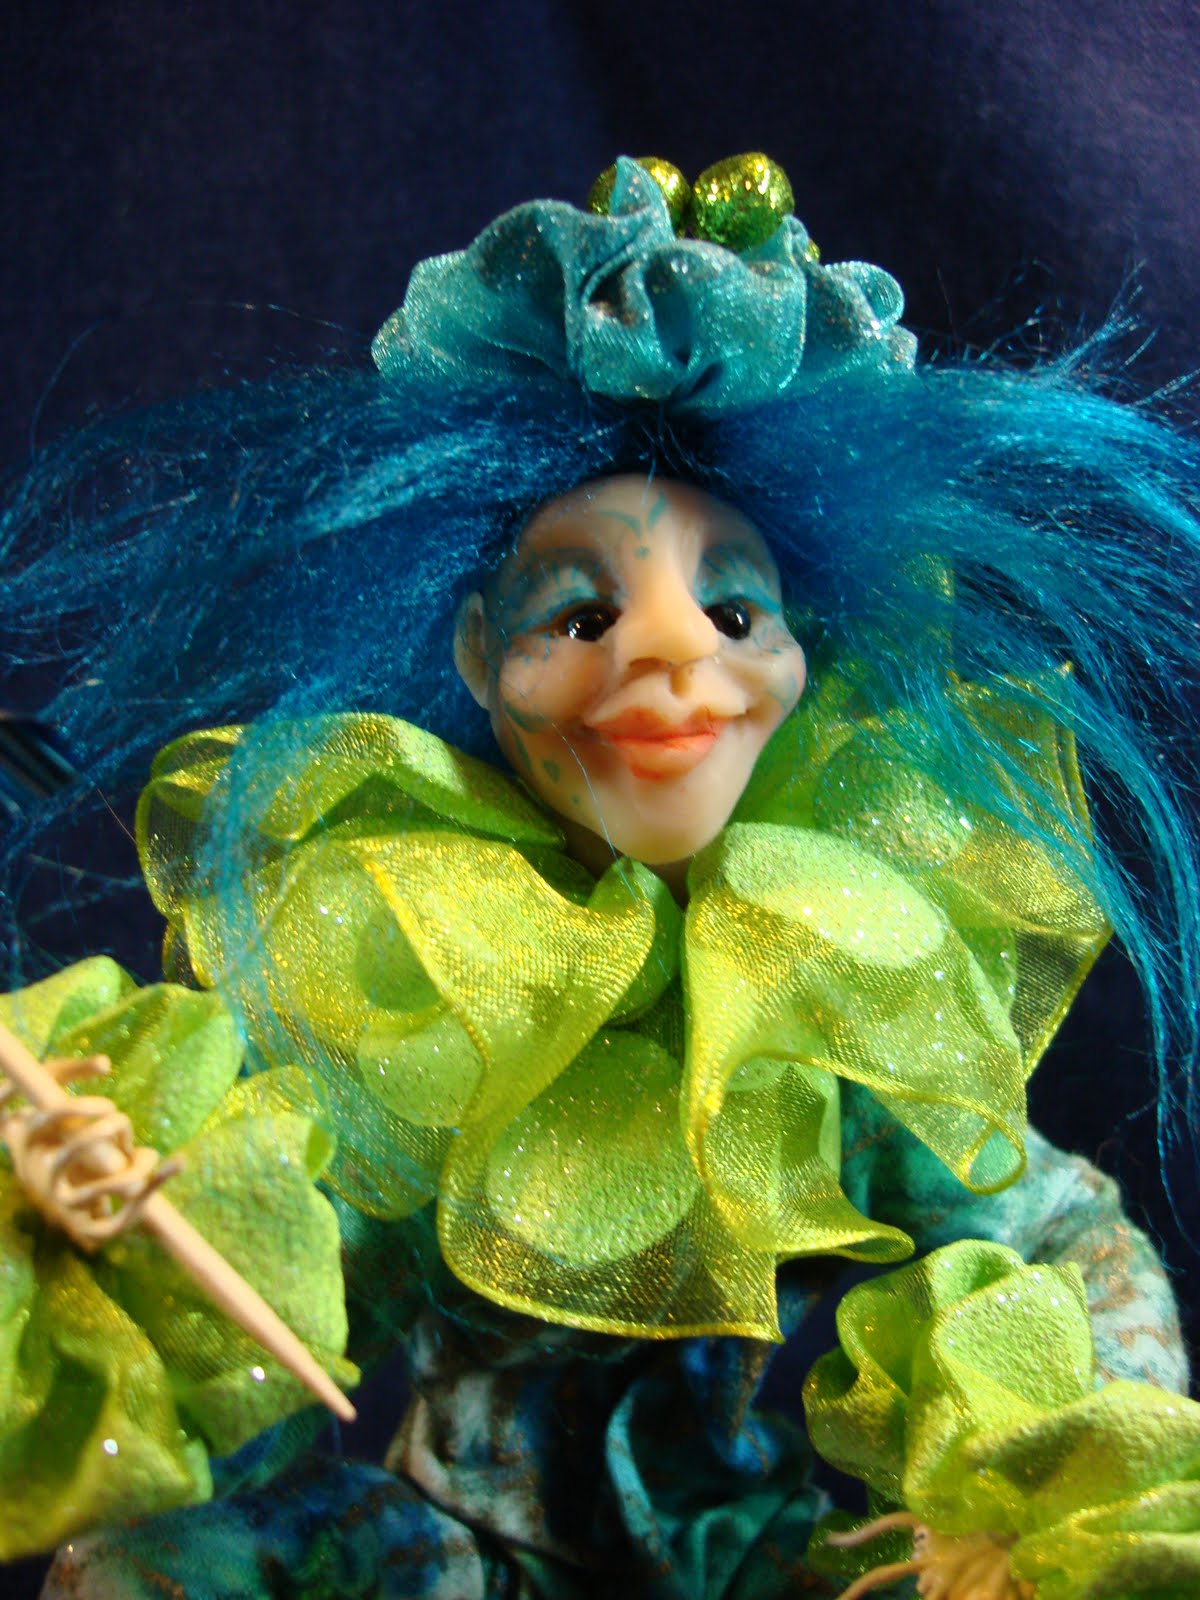
As I mentioned earlier, the theme this year for our conference was Cirque de la Luna, so I made the face a moon, with a blue hat with stars and gave him a clown's ruffle collar. I created an acrobat clown to sit upon the hat.
I hand dyed, painted and stenciled the fabric for the acrobat's costume. (finally played around with the shiva paintsticks that I bought at the quilt show a couple of years ago.

Acrobat before dressing
Since I had two ornaments, I created two dolls, keeping one for myself. The ornaments were plastic soI had to use an air-dry clay to sculpt the moon face and hat, but I used Living Doll for the acrobat's face. I made the shoes from canes I had left over from Donna Kato's workshop.

Donated doll close up
My doll close up
Both dolls completed