Sunday, November 17, 2013

Burlap Canvas Clock


When I spotted these burlap canvases from Michaels, I thought they were really cool. I knew I wanted to create a project with them. They are available in select stores on the Pinterest In-store Featured Endcaps. While normally I buy all of my supplies for projects that I make, Michaels provided me with the supplies to create this project. (though I have gone and bought more canvases!)


Time Clock Collage


Materials:
Burlap Canvases (4x12, 2 - 6x6)
Art Minds Clock Movement Kit
Art Minds Clock Face Dial
Art Minds MDF Letters (TIME)
Tim Holtz idea-ology Clock Faces
Tim Holtz idea-ology Game Spinners
Tim Holtz idea-ology Brads
Americana Mixed Media Stencil (Timeless Treasures)
Acrylic Paint (brown)
E6000 Adhesive
Martha Stewart Sponge Pouncers
 
 The letters pictured here are white, but I decided black looked better, so I used them instead.


1. Adhere clock face to center of 6 x 6 canvas
 
2. Poke hole in center of canvas
3. Insert clock movement, following directions on package
 
4. Stencil design on other canvases
5. Glue letters to 4 x 12 canvas
 
6. Glue metal clock faces
 
 
7. Attach game spinners with brads to center of clock faces


Sunday, November 03, 2013

Victorian Art Doll Witch

This Year's Witch

Every year I create another art doll witch to add to my growing collection. Here is this year's version - she's a little Victorian-style, not a traditional witch.
 
Nina Owens Victorian-style Art Doll Witch


Close up - Victorian Art Doll Witch by Nina Owens
 I'm still exploring dolls using birdcages. This is an antique cage a friend gave me. True to Victorian-nature, her cage is filled with bottles of potions and elixirs. I played around with pan pastels for coloring her face. It was a new medium for me and I really enjoyed using it for her face.

Tuesday, October 15, 2013

Basil Salt Gift Jars


Basil Salt Gifts

Basil Salt Gift Idea from Nina Owens
This is another pin there - done that project. It's no secret that I'm an avid Pinterest fan or that I usually have an over-abundance of basil. I spotted the idea for basil salt on Home Is Where The Boat Is (one of my favorite blogs).
I made the basil salt and packaged it in Glass Snap Top Wedding Favor Jars that I found at Michaels. I made the labels, printed them and attached them with double-sided tape (another tip I picked up from a Pinterest project). I found the salt spoons on ebay. Such a quick, easy, nice little gift!

Basil Salt Materials by Nina Originals
 
Label for Basil Salt


Monday, October 14, 2013

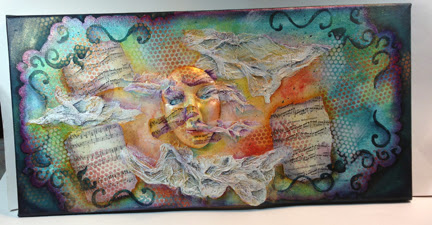
Mixed Media Collages

Mixed Media Collage by Nina Owens

Mixed media canvas in progress by Nina Owens

Adding color - mixed media collage canvas by Nina Owens
Mixed Media Collage Canvas by Nina Owens
I had fun playing around with colors and textures on canvases this year. The quote is from the song "Enjoy the Ride" by Morcheeba from Deep Dive.


Sunday, October 13, 2013

Mixed Media Canvas Collage

This is actually the first canvas I created in what became a series of three that I hung in my studio. The first picture is the original color combination I created and the second once I reworked the colors so it would coordinate with the other two canvases I made in the series. The verse is from "Enjoy the Ride" by Morcheeba from Deep Dive.

Mixed Media Canvas Collage by Nina Owens
Canvas once I reworked the colors

From Quincenera to Ghost Doll

Ghost Doll by Nina Owens
Remember last year's Quincenera Doll makeover? I had a couple more on hand and decided to turn one into a ghost doll. Unfortunately Michaels, where I got the original doll no longer carries them. You could turn any porcelain doll into your own ghost using the same steps.
Close up of face

I carefully removed the wig and spray painted it with white spray paint until I got the desired look. I also removed the eyelashes and removed the original paint using nail polish remover. Once I'd removed the paint, I sanded lightly and applied white gesso. I used gray and black acrylic paint to repaint the face. The clothes are hand-sewn on the body, with vintage trims added. For the interior of the ghost cage, I repainted an English cottage house to make it look more like a haunted mansion. I got the moss and Spooky Town tombstones from Michaels.

Sunday, October 06, 2013

Halloween Décor


The materials
Adding glass beads for eyes
and forming nose
 I spotted these cool foam skulls in Michaels from their Celebrate It! Halloween collection. I thought they would be the perfect base for sculpting - after all they are already the proper foundation for a head.
Starting sculpting by adding
clay around form
Finished with sculpting


Sealed with gesso, then antiqued
with wash of brown acrylic paint


Glass jar that I've had for years
from Michaels. I used a rust
patina on it to age. Added dried
lichen moss.
 
 
                  2-step crackle medium added &
                    antiqued with black. Eyes painted.
                         Glaze added to lips and eyes
 
    
Finished Head-in-Jar


Latest Jewelry Creations


Spiral done with twisted bugles. Raku heart
pendant bought at Bead & Button Show last year


Class piece from Tyler Bead Retreat


Steampunk style with metal beads and
clock & gear charms
Another class piece from Tyler Bead Retreat


 Blue coral pendant with beading

Wooden beads bought at
convention this year

The Pond 


The pride of my backyard landscaping
Pond with water lilies. They only bloom in the
spring before the leaves fill out on the trees,
otherwise they don't get enough sun to bloom.


Lilies in bloom


Goldfish waiting to be feed
Lily in bloom

 
Friends enjoying lunch by the pond 

Zeke taking a drink from the pond,
watching the fish.


What Almost 30 Years of DIY Landscape Looks Like


Backyard landscaped area view from south side

 
View from back of yard towards backyard, decks & house
You can hardly see the house for the trees. Yes, Ben's
shop is equipped with TV


From house towards back of yard. Old
metal bed frame covered with Asian jasmine
My husband and I have spent almost 30 years working on the landscaping of our home. It started with digging up and planting red oak trees when we first moved into the house. Once the trees started growing and the yard became more shaded, we added different landscaping features - a shade bed, decks and patios, brick walkways, my pond with waterfall, more shade beds. We've also added a vegetable garden at the back of the property (we have just under 1 1/2 acres). Most all of the features in our landscaping are salvaged materials and not purchased new.


Walkways and patios are built from salvaged bricks, which is why we have various colors. Old metal bed frames are used for trellises for vining plants. The wooden bench and table beside it incorporate metal wagon wheels and rims. The fire pit was constructed from an old tractor tire rim.