Several years ago I started a canvas - mainly to test a couple of new products, a crackle and texture medium. The canvas sat in my studio for a while, was stuck in a closet and generally moved from place to place as it go into my way. From time to time I would pull it out and think about finishing it, but the inspiration on what to do never did strike. For one thing, it is a rather large canvas, so it needed something that wouldn't get lost or look out of place. The mask evening class that I took at EDAC gave me an idea. I molded a large paper clay face and glued it to the canvas. Michaels has a fabulous line of flower embellishments from Recollections called Boutique Fleur. I bought several of the jars of flowers and decided to use them on the canvas. Friday evening I stopped by Aaron Brothers and picked up a few items, including some velvet stickers from Stampendous. I collaged handmade papers, stenciled a few words, added the dimensional flowers, painted some grungeboard flourishes and added the velvet sticker leaves to finish the canvas. I'm very pleased with the way it turned out & will take it to work to hang in my cube.
Sunday, August 22, 2010
Tidepool Necklace
My friend, Ellen created small sea creature beads for me for my birthday - an octopus & a few stingrays. While pulling beads to make a necklace out of my treasures, I ran into a polymer clay pendant that I had gotten from my friend, Sherry in a swap. It was the perfect color and design to go in the necklace, but not the right size. I took an exacto knife to the pendant, cut it into three pieces and shaved the edges a bit - perfect! They were exactly what I needed for the necklace. I used 4 different color/toned bead soups in creating the necklace, two turquoise/teal and two in the sandy, neutral colors.
Sunday, August 15, 2010
Of course there were pin dolls to make for the swap and for the pin doll challenge. I made the moon faces with clown hats for the swap. I was doing an acrobat on the moon for the challenge doll, but as I began clothing it, the doll decided she wanted to be a star. I got third place for the challenge pin.
In keeping with the circus theme, the hospitality committee planned midway style games for our opening night ice breaker. One of the games required creating a "critter" to be eligible to play. I was going to keep the clown critter for myself, but I decided to give both the lion & clown to the games.
In keeping with the circus theme, the hospitality committee planned midway style games for our opening night ice breaker. One of the games required creating a "critter" to be eligible to play. I was going to keep the clown critter for myself, but I decided to give both the lion & clown to the games.
 |
| Prototype |

 This year the theme for the Enchanted Doll Artist Conference was Cirque de la Luna, or Circus of the Moon. This theme really spoke to me artistically and I had no trouble coming up with items for the theme. I didn't go for the traditional circus, rather I leaned towards a Cirque du Soleil slant. I designed a prototype for the table favor dolls last fall and took advantage of Michaels Thanksgiving sale to stock up on ribbons and picks to use on the dolls. Once we had the prototype, Lisa, Vicki & I started creating the dolls. We got together first to scuplt all of the moons for their bases. The next time we got together we created the little circus performers. Finally we took them home and finished them, adding all sorts of embellishments. They were voted first place at the conference for table favors! I really did love this theme and felt like it stretched and expanded my doll designs and creations. It was really fun coming up with the different poses for the performers.
 |
| With faces painted |
 |
| Sculpted with air-dry clay |
 I created a 2nd centerpiece doll to donate. This doll had an unusual beginning. A couple of years ago my secret Santa at work gave me two big, red, plastic ornaments (I don't decorate anymore for Christmas & red is definately not one of my favorite colors). I always felt I could do something with them. At one time I thought I would do a puppet head with a hat - due to the shape of them.
 As I mentioned earlier, the theme this year for our conference was Cirque de la Luna, so I made the face a moon, with a blue hat with stars and gave him a clown's ruffle collar. I created an acrobat clown to sit upon the hat.
I hand dyed, painted and stenciled the fabric for the acrobat's costume. (finally played around with the shiva paintsticks that I bought at the quilt show a couple of years ago.
 |
Acrobat before dressing |
Since I had two ornaments, I created two dolls, keeping one for myself. The ornaments were plastic soI had to use an air-dry clay to sculpt the moon face and hat, but I used Living Doll for the acrobat's face. I made the shoes from canes I had left over from Donna Kato's workshop.
 |
| Donated doll close up |
 |
| My doll close up |
 |
| Both dolls completed |
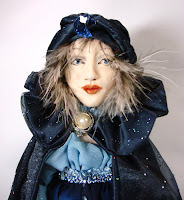
I had the opportunity to try a new clay released by Polyform called Living Doll. I LOVE this clay. For me it performs perfectly for sculpting my art dolls. I created the face of this doll the first time I used the clay. I decided to finish her and donate her to the Enchanted Doll Artist Conference as a banquet centerpiece doll, which are auctioned off as fundraisers to help defray the expense of the conference. She became the Gypsy of the Moon.
Fish Workshop
At the first of the summer, my friend, Ellen taught her very first workshop and she showed us how to create the fabulous fish. I really enjoyed this workshop and created 6 fish! I plan on making a mobile with them to hang in my studio. Aren't they fun?
At the first of the summer, my friend, Ellen taught her very first workshop and she showed us how to create the fabulous fish. I really enjoyed this workshop and created 6 fish! I plan on making a mobile with them to hang in my studio. Aren't they fun?
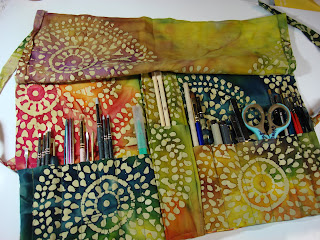
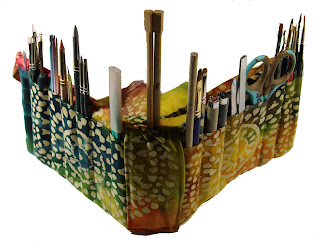
I designed a tool carrier a few years ago and have perfected the design as I have made more of them. I had numerous requests to make them to sell and I finally got around to doing that this summer. The one I was using was from a previous edition. While cleaning out my sewing room, I ran into a roll of SewPaintable canvas. This is canvas that was developed to allow you to paint or draw on it and to sew it as well. I decided to make myself a truly unique tool carrier (incorporating the latest pattern). I drew on the canvas and colored it with Prismacolor permanent markers.
The carrier is designed to fold up like a book for easy transporation to workshops or to be packed into a case for traveling.
The carrier is designed to fold up like a book for easy transporation to workshops or to be packed into a case for traveling.
More shoes - seems like these are very popular. My Mom requested that I do a pair for her for her birthday using the colors I did on my friend, Edie's shoes. Here are the ones I did for Mom.
Subscribe to:
Comments (Atom)


.JPG)


