Showing posts with label art dolls. Show all posts

Sunday, October 28, 2012

Trunk Show & Rhonda's House

A couple of weeks ago I attended a trunk show at my friend Rhonda's home. Going to Rhonda's is always such a treat, her home is AMAZING and filled with color and art. The trunk show with art by Lisa Renner, Trisha Dewey and Rhonda was fabulous as well.
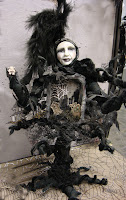
Art Dolls by Lisa Renner

Ellen, Lisa, Vicki, Trisha & Rhonda

Art in atrium

Mobile twirls by fan-power

Metal Sculpture

Living Room w/trunk show

Sculpture by pool

Love this lighted sculpture under stairway

Stairway filled with Rhonda's Scarves

Trunk Show

Dining room with Trisha's trunk showings

Love this metal sculpture piece in bathroom

Display in bathroom

Trisha's encaustic pieces

Sculpture in front of house

Love these ferns!

Sunday, July 01, 2012

All Dolls Are Art Conference
It's July and that means the All Dolls are Art Conference is this month. I've been spending quite a bit of time getting ready, making centerpieces, pin dolls, stuff for goodie bags, etc. The theme this year is World of Make Believe and it is going to be so much fun!

Close up fairy
I finished my centerpiece doll, a fairy on a mushroom. She will be auctioned off as one of the fund raisers. The base is a wooden mushroom smoker from Zims that I've had for years - the perfect perch for a fairy.

Mushroom base painted


Fairy on Mushroom Centerpiece


Dyed cheesecloth


Pin Dolls Wrapped & Ready
Start of pin dolls

Sunday, April 29, 2012

Getting Ready for ADAA
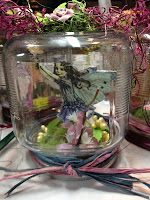
It's almost May which means the All Dolls Are Art Conference is only 3 months away! The theme this year is The World of Make Believe and I can't wait. It is going to be so much fun. Vicki & I completed our table favor dolls and they are on a shelf in my studio waiting to be packed for the conference. I got the idea from Pinterest for the fairy jar centerpieces for the opening night Welcome to the World of Make Believe festivities that Vicki & I made this month.
I've still got to make my costume for opening night, pin dolls, stuff for my sales table, stuff for the goodie bag and finish my banquet centerpiece doll. I started the centerpiece doll yesterday and it is coming along nicely. Better get back to work, the conference will be here before we know it.
There's still time & space for you to join us, all the details are here All Dolls Are Art Conference
Here are some of the fairy jars and the table favor dolls.

Sunday, November 13, 2011

More Dolls


I've created several dolls this year. I had the opportunity to test a new clay prior to its arrival in the store. It is Art Minds Clay Mache, Michaels private label brand of air dry clay. I LOVE it. It sculpts like a dream, is easy to smooth and blend into itself and sands beautifully. I like it so much, I've done more air dry clay dolls recently than polymer clay ones. The good news is that it is now available in the Michaels store. Here is one of the first sample dolls I made with it. She is entirely sculpted from the air dry clay, head, arms, hands, legs, feet and body. She's dressed with stuff from the floral department and her hair is faux fur.
Close up


Aren't those glittered tennis shoes the coolest?


This summer I also took an online workshop with Christy Meyers of CC Whimsies. We created a pumpkin fairy doll. The workshop was a doll to hang on the wall, but I'd found these really cool glittered tennis shoes at Treasures of The Gypsy at the ADAA doll conference in Austin and wanted to use those, so my pumpkin fairy stands. This was a great workshop as it was all done with videos and Christy even generously provided us with a pdf file as well.
I sculpted a couple of extra heads during the workshop. One I turned into a steampunk box doll and the other one is still waiting on my to create the rest of it.

This doll is also from the clay mache clay and uses a paper mache mannekin form for her body. She's a mixed media doll inspired by the Santos dolls.
I played around with some polymer clay dolls this year, too. One has a box body and the other has a candlestick for the body. I taught the box one as my break-out session on the Michaels Crafting Cruise in October.

Saturday, October 23, 2010

It's no secret that I love Halloween. Every year I create Halloween-inspired dolls and crafts. Last year I did the Haunted Tree doll and the Book of Spells with the witch I took in an online class. This year I created a stump doll witch inspired from some Alexander Henry fabric, The Ghastlies. Rather than leaving all these scattered around my home, I thought I would decorate my cube at work. I used The Ghastlies fabric as a backdrop behind the bookcase in my cube and draped the bookcase with some sheer spiderweb fabric.
I created a vignette with the art dolls and coffins I'd decorated last year and even did a skull rose bouquet. I used another Halloween fabric to cover the rest of that side of my cube. I hung ornaments, ATCs and a 4x4 (both that I have made & received in swaps) on that section. This year my cube is fun and perfect for the season.
I also receive lots of Altoid tins from coworkers - they know I use them in my art, so this Halloween I decided to decorate them for Halloween and gave them to my coworkers.


I hope every one has a safe & Happy Halloween...bwaaaaaaaaaaahhhahahhahaha

Sunday, September 19, 2010

Two Less Heads on Sticks
I love to sculpt faces and I generally have several "heads on sticks" (sculpted heads on dowels) sticking in the tool holder or in the paintbrush basin on my studio table. Sometimes it takes me a while to get around to completing the dolls.
Professor Pocus changed so many times from the original concept (and his head had been around my studio for a couple of years). Originally I intended to do a European style hobo clown holding a skeletal umbrella. The idea was to put him in the guest room when I had it painted. I sculpted his head, hands and feet and there he sat in that state for over a year.
Then I had the idea to use him in a box, he was going to be a magician with a top hat with a rabbit coming out of the top of the hat on his head. I began working on the box...but...that's not really what he wanted to be either.
The box took on a more rustic look and I added the great feet by Tim Holtz. The box dictated that he be more of the traveling snake oil salesman, so I started working on that concept.
I was doing his body out of a piece of 2x4. I drilled and glued and attached his hands, arms and head. Again it sat, not quite coming together.
Last month when the gals were over for our monthly art play day, I got the idea to carve out the center of the 2x4. I dug out my handcarving tools and started working on hollowing out the center. (Husband asked why I didn't just go out to his shop and use the power tools - heck, it was 104 degrees that day & it is an uninsulated metal building).
Once I carved out the center, he began coming together quickly. I used grunge board and dies to cut gears. I painted them and added them inside the 2x4. I also used Tim's sprocket gears. I decoupaged pages from an old book on the top hat and dressed him with mulberry paper. I found the perfect item in my stash for him to hold, one of the Industrial Chic pieces I had picked up from Michaels several months ago.
So now I'm proud to introduce Professor Pocus & his Traveling Magic Show.
The other head on a stick that had been sitting around my studio was done with an air-dry clay that I was testing (I love this stuff - I do hope it becomes available soon). I decided that I wanted a cloth doll for this one, so I got out one of my Patti Culea books, Creative Cloth Doll Couture and used the pattern from it. I made the doll body and it was too small. I had to enlarge the pattern. The second doll was much better sized.
I gessoed the doll and painted her with Tim Holtz crackle paint. I used distress inks to enhance the crackles and to give her some aged character. I choose old laces to dress her and created her boots, skirt and belt from ostriche hide. I liked the hat that I'd done for the professor so much that I took rusted sewing patterns and stamped on them to decoupage on her hat. I added a Boutique Fleur flower from the Recollections collection with lace to trim her hat. I haven't decided on a name yet...any ideas?

Sunday, August 15, 2010

While I was on a roll with the conference theme, I created what I call the Moon Riders, acrobats on a cresent moon. The burgandy one was a custom order for a lady at work.