Thursday, December 30, 2010

Happy Holidays!
 
 A little late, but none-the-less... I'm still not decorating for the holidays at home, but decided to dust off my collection of Santas that I did years ago and bring them to decorate my cube at work. It was interesting looking at the dates on some of them (gee, has it been THAT long?) and remember the workshops I took or classes I taught.
It's been a long time since I did decorative painting, I prefer sculpting more now. This year I did ornaments for gifts on small glass ornaments, Santa faces and little elves with burr oak caps.
I sculpted some old world Victorian-style Santas on heart-shaped glass ornaments, which I also gave as gifts.
 Our department has an annual ornament contest, which encourages me to create a more elaborate ornament each year. This year I decided to do an ornament featuring the 4 seasons, spring, summer, autumn and winter. I got the prize for best overall for this one.
 Winter is the old man with holly leaves and berries.
 Autumn shows the abundance of the harvest, with grains, grapes and fall leaves.
 Spring is the young girl with daffodils and morning glories.
 Summer features roses.

I hope everyone has a happy, safe and prosperous New Year!!!

Saturday, October 23, 2010

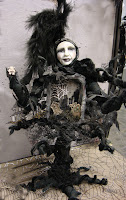
It's no secret that I love Halloween. Every year I create Halloween-inspired dolls and crafts. Last year I did the Haunted Tree doll and the Book of Spells with the witch I took in an online class. This year I created a stump doll witch inspired from some Alexander Henry fabric, The Ghastlies. Rather than leaving all these scattered around my home, I thought I would decorate my cube at work. I used The Ghastlies fabric as a backdrop behind the bookcase in my cube and draped the bookcase with some sheer spiderweb fabric.
I created a vignette with the art dolls and coffins I'd decorated last year and even did a skull rose bouquet. I used another Halloween fabric to cover the rest of that side of my cube. I hung ornaments, ATCs and a 4x4 (both that I have made & received in swaps) on that section. This year my cube is fun and perfect for the season.
I also receive lots of Altoid tins from coworkers - they know I use them in my art, so this Halloween I decided to decorate them for Halloween and gave them to my coworkers.


I hope every one has a safe & Happy Halloween...bwaaaaaaaaaaahhhahahhahaha

Sunday, September 19, 2010

Two Less Heads on Sticks
I love to sculpt faces and I generally have several "heads on sticks" (sculpted heads on dowels) sticking in the tool holder or in the paintbrush basin on my studio table. Sometimes it takes me a while to get around to completing the dolls.
Professor Pocus changed so many times from the original concept (and his head had been around my studio for a couple of years). Originally I intended to do a European style hobo clown holding a skeletal umbrella. The idea was to put him in the guest room when I had it painted. I sculpted his head, hands and feet and there he sat in that state for over a year.
Then I had the idea to use him in a box, he was going to be a magician with a top hat with a rabbit coming out of the top of the hat on his head. I began working on the box...but...that's not really what he wanted to be either.
The box took on a more rustic look and I added the great feet by Tim Holtz. The box dictated that he be more of the traveling snake oil salesman, so I started working on that concept.
I was doing his body out of a piece of 2x4. I drilled and glued and attached his hands, arms and head. Again it sat, not quite coming together.
Last month when the gals were over for our monthly art play day, I got the idea to carve out the center of the 2x4. I dug out my handcarving tools and started working on hollowing out the center. (Husband asked why I didn't just go out to his shop and use the power tools - heck, it was 104 degrees that day & it is an uninsulated metal building).
Once I carved out the center, he began coming together quickly. I used grunge board and dies to cut gears. I painted them and added them inside the 2x4. I also used Tim's sprocket gears. I decoupaged pages from an old book on the top hat and dressed him with mulberry paper. I found the perfect item in my stash for him to hold, one of the Industrial Chic pieces I had picked up from Michaels several months ago.
So now I'm proud to introduce Professor Pocus & his Traveling Magic Show.
The other head on a stick that had been sitting around my studio was done with an air-dry clay that I was testing (I love this stuff - I do hope it becomes available soon). I decided that I wanted a cloth doll for this one, so I got out one of my Patti Culea books, Creative Cloth Doll Couture and used the pattern from it. I made the doll body and it was too small. I had to enlarge the pattern. The second doll was much better sized.
I gessoed the doll and painted her with Tim Holtz crackle paint. I used distress inks to enhance the crackles and to give her some aged character. I choose old laces to dress her and created her boots, skirt and belt from ostriche hide. I liked the hat that I'd done for the professor so much that I took rusted sewing patterns and stamped on them to decoupage on her hat. I added a Boutique Fleur flower from the Recollections collection with lace to trim her hat. I haven't decided on a name yet...any ideas?

Sunday, August 22, 2010

Finally finished
Several years ago I started a canvas - mainly to test a couple of new products, a crackle and texture medium. The canvas sat in my studio for a while, was stuck in a closet and generally moved from place to place as it go into my way. From time to time I would pull it out and think about finishing it, but the inspiration on what to do never did strike. For one thing, it is a rather large canvas, so it needed something that wouldn't get lost or look out of place. The mask evening class that I took at EDAC gave me an idea. I molded a large paper clay face and glued it to the canvas. Michaels has a fabulous line of flower embellishments from Recollections called Boutique Fleur. I bought several of the jars of flowers and decided to use them on the canvas. Friday evening I stopped by Aaron Brothers and picked up a few items, including some velvet stickers from Stampendous. I collaged handmade papers, stenciled a few words, added the dimensional flowers, painted some grungeboard flourishes and added the velvet sticker leaves to finish the canvas. I'm very pleased with the way it turned out & will take it to work to hang in my cube.
Tidepool Necklace
My friend, Ellen created small sea creature beads for me for my birthday - an octopus & a few stingrays. While pulling beads to make a necklace out of my treasures, I ran into a polymer clay pendant that I had gotten from my friend, Sherry in a swap. It was the perfect color and design to go in the necklace, but not the right size. I took an exacto knife to the pendant, cut it into three pieces and shaved the edges a bit - perfect! They were exactly what I needed for the necklace. I used 4 different color/toned bead soups in creating the necklace, two turquoise/teal and two in the sandy, neutral colors.

Sunday, August 15, 2010

While I was on a roll with the conference theme, I created what I call the Moon Riders, acrobats on a cresent moon. The burgandy one was a custom order for a lady at work.
Of course there were pin dolls to make for the swap and for the pin doll challenge. I made the moon faces with clown hats for the swap. I was doing an acrobat on the moon for the challenge doll, but as I began clothing it, the doll decided she wanted to be a star. I got third place for the challenge pin.

In keeping with the circus theme, the hospitality committee planned midway style games for our opening night ice breaker. One of the games required creating a "critter" to be eligible to play. I was going to keep the clown critter for myself, but I decided to give both the lion & clown to the games.
Prototype
This year the theme for the Enchanted Doll Artist Conference was Cirque de la Luna, or Circus of the Moon. This theme really spoke to me artistically and I had no trouble coming up with items for the theme. I didn't go for the traditional circus, rather I leaned towards a Cirque du Soleil slant. I designed a prototype for the table favor dolls last fall and took advantage of Michaels Thanksgiving sale to stock up on ribbons and picks to use on the dolls. Once we had the prototype, Lisa, Vicki & I started creating the dolls. We got together first to scuplt all of the moons for their bases. The next time we got together we created the little circus performers. Finally we took them home and finished them, adding all sorts of embellishments. They were voted first place at the conference for table favors! I really did love this theme and felt like it stretched and expanded my doll designs and creations. It was really fun coming up with the different poses for the performers.